How to move UniFi Controller to UniFi Cloud Key Gen.2
How to move UniFi Controller to UniFi Cloud Key Gen.2

I finally bought a UniFi Cloud Key Gen.2 (UCK) and will now move my existing UniFi Controller (running on a Ubuntu LXC container) to the new UCK. I'll explain all the steps i did in this blog article.
Step 1: Create a "settings only" backup of the existing UniFi Controller
Step 2: Setup the UniFi Cloud Key Gen.2 using the UniFi Network app
To setup the UniFi Cloud Key you need to have the UniFi Network app installed on your mobile device. If you don't have already downloaded the UniFi Network App, you can use one of these links:
Setup UniFi Cloud Key Gen.2 using the UniFi Network app:
The UCK should be automatically detected by the UniFi Network app
Caution: I already have a Ubiquiti Account configured in my mobile app. You may have to create a Ubiquiti Account here first: https://account.ui.com/login. The remote e.g. cloud access is explained in detail on this page: https://help.ui.com/hc/en-us/articles/115012240067-UniFi-How-to-Enable-Remote-Access-for-Remote-Management.
However if you don't use remote access and SSO in the "old" UC you want to update, the remote access and SSO settings will be overridden when restoring the backup file. To re-enable see step 6.
You can also use the UCK quick start guide: https://dl.ubnt.com/qsg/UCK-G2/
Step 3: Update UCK Gen.2 firmware
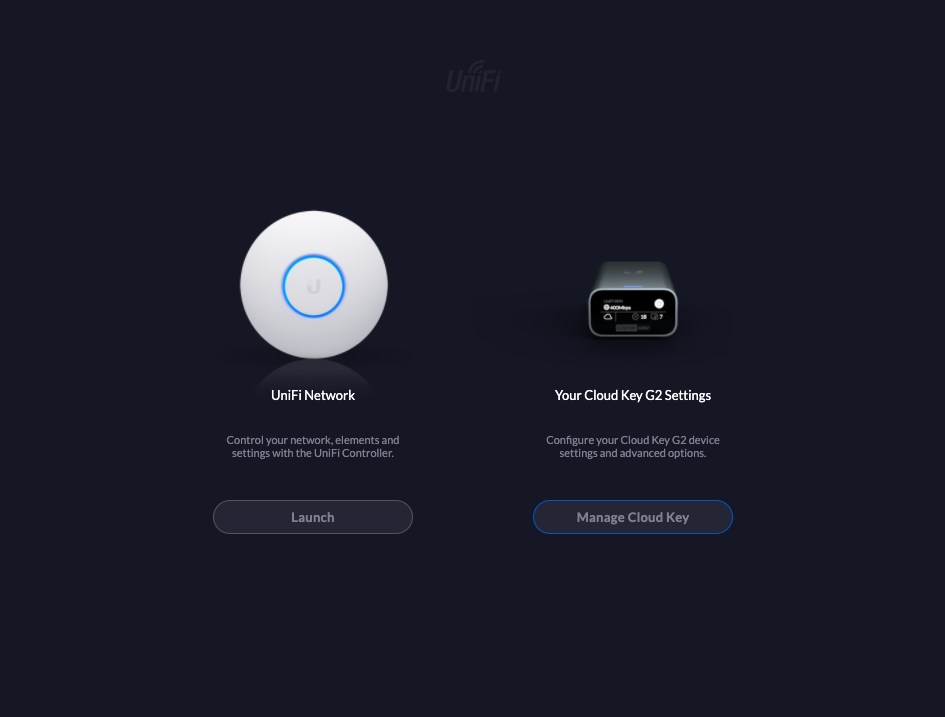
Open your Browser and enter the IPv4 address shown on the small display of the UCK device. You will see at least 2 different login buttons:
- Manage Cloud Key: for managing the UCK itself
- Launch: Login to the UniFi Controller

Click on Manage Cloud Key and update the firmware:
Step 4: Update UniFi Controller on the UCK
Now login to the UniFi Controller on the UCK and update to the latest version:
Or you can navigate to Settings -> System Settings -> Maintenance -> Update to update.
Step 5: Stop the old UniFi Controller and import backup file to the new UC on the UCK
You should now stop the old UniFi Controller.
In my case, I wanted to have the new UCK using the same static IPv4 as the old UniFi Controller. So I stopped the old UC and updated the IPv4 of the new UCK to be the same as for the old UniFi Controller.
Optional sub step - Update the UCK IPv4 address:
Finally import e.g. restore the backup on the new UniFi Controller.
Import UC settings only backup file into the new UC running on the UCK:
Step 6: Re-enable cloud access and SSO (when overridden by UC backup restore)
This step may be optional for you.
If you had already an Ubiquiti account and enabled the remote access and SSO prior to the move, you won't need to do anything here. Otherwise you need to re-enable to remote access and SSO to be able to login with the Ubiquiti account. Especially when you created a new Ubiquiti account for the UCK setup.
Re-enable remote access and Ubiquiti SSO:
Now we're already done. Everything should be setup on the new UniFi Controller running on the UniFi Cloud Key Gen.2.
You may want to fine tune some settings on the UCK (Manage Cloud Key) like the timezone or the device name.
Link to the UniFi Portal to login with "remote access":